System Image Flashing
1. Preparation Work
The factory-installed image is mainly used to test whether the interface functions of the development board are normal, and its update frequency is relatively low. To ensure the normal operation of the development board, it is recommended that upon receiving the development board, users use tools such as a USB Type-A to Type-C data cable to flash the system image provided in the network disk by themselves.
2. Image Download
The Luckfox Nova provides the buildroot image. Users can download the image file according to their own needs.
| Version | Description | Download |
|---|---|---|
| Builldroot | Supports flashing to the eMMC storage medium | Google Driver |
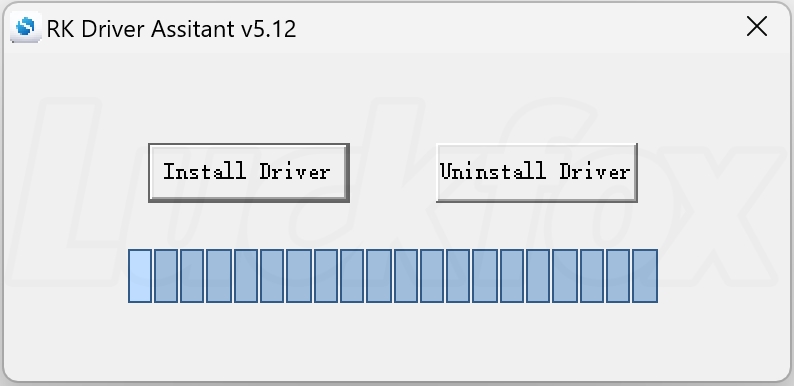
3. Driver Installation
- Download the RK DriverAssitant(click here to download).
- Open the RK Driver Assistant to install the USB driver. There is no need to connect during this process. After the installation is complete, restart the computer.
4. Enter the Flashing Mode
The Loader mode and the MaskRom mode are two common device upgrade modes used to load firmware or boot programs.
- The Loader mode loads via the boot program at the software level and is usually used for operations such as firmware upgrades.
- The MaskRom mode is a hardware - level startup mode that operates by directly loading the firmware and is typically used for factory flashing or device repair.
4.1 Enter the Loader Mode
- Download and extract the RKDevTool flashing tool(click here to download).
- While holding down the BOOT key, connect the device to the computer. Release the BOOT key after the Rockchip flashing tool displays
Found One LOADER Device.
- If the device is not properly recognized as a
Loaderdevice, check whether the development board is correctly recognized in the Device Manager. When correctly recognized, the Device Manager should display the following for the development board: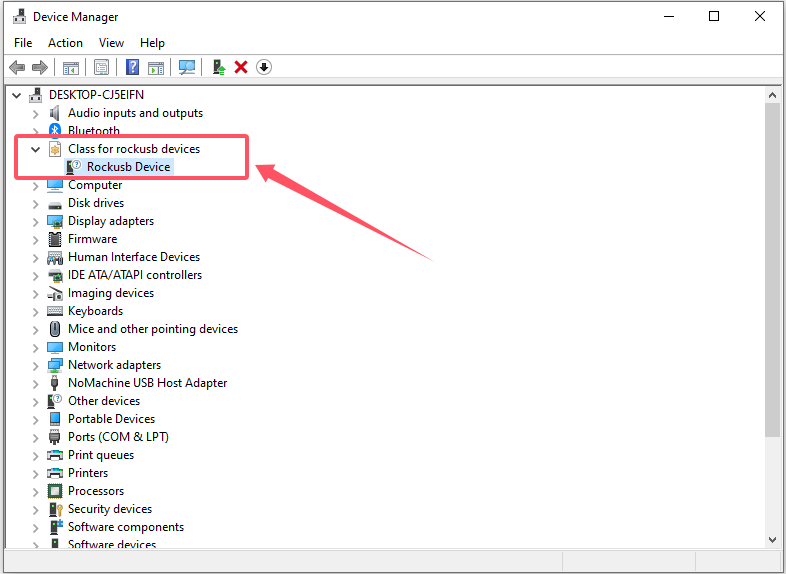
- If the device is already connected to the computer, there is no need to unplug and replug it. Hold down the RESET key, then hold down the BOOT key, and release the RESET key. When the device is recognized as being in the
LOADERmode, release the BOOT key.
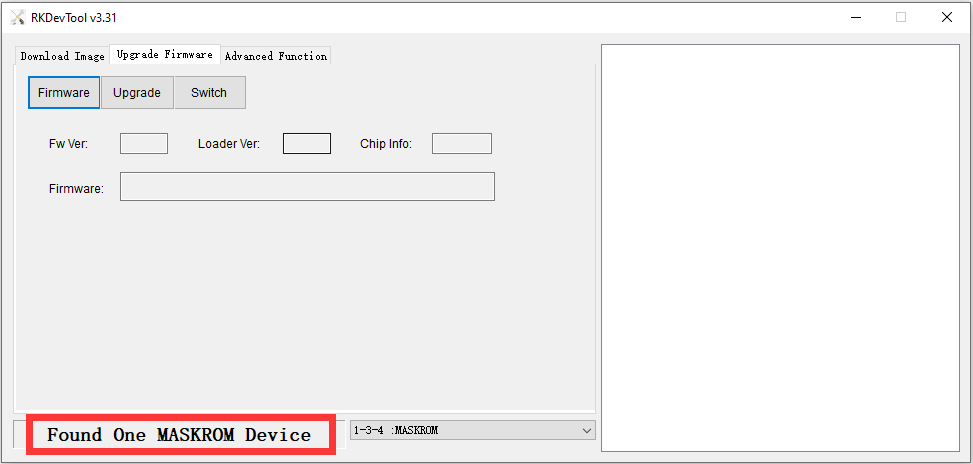
4.2 Enter the MaskRom Mode
If, after ruling out external factors such as the download cable and the computer, the development board still cannot enter the Loader mode, you may consider forcing it to enter the MaskRom mode for recovery.
Disconnect the power supply of the development board and short-circuit the eMMC data pin and GND.
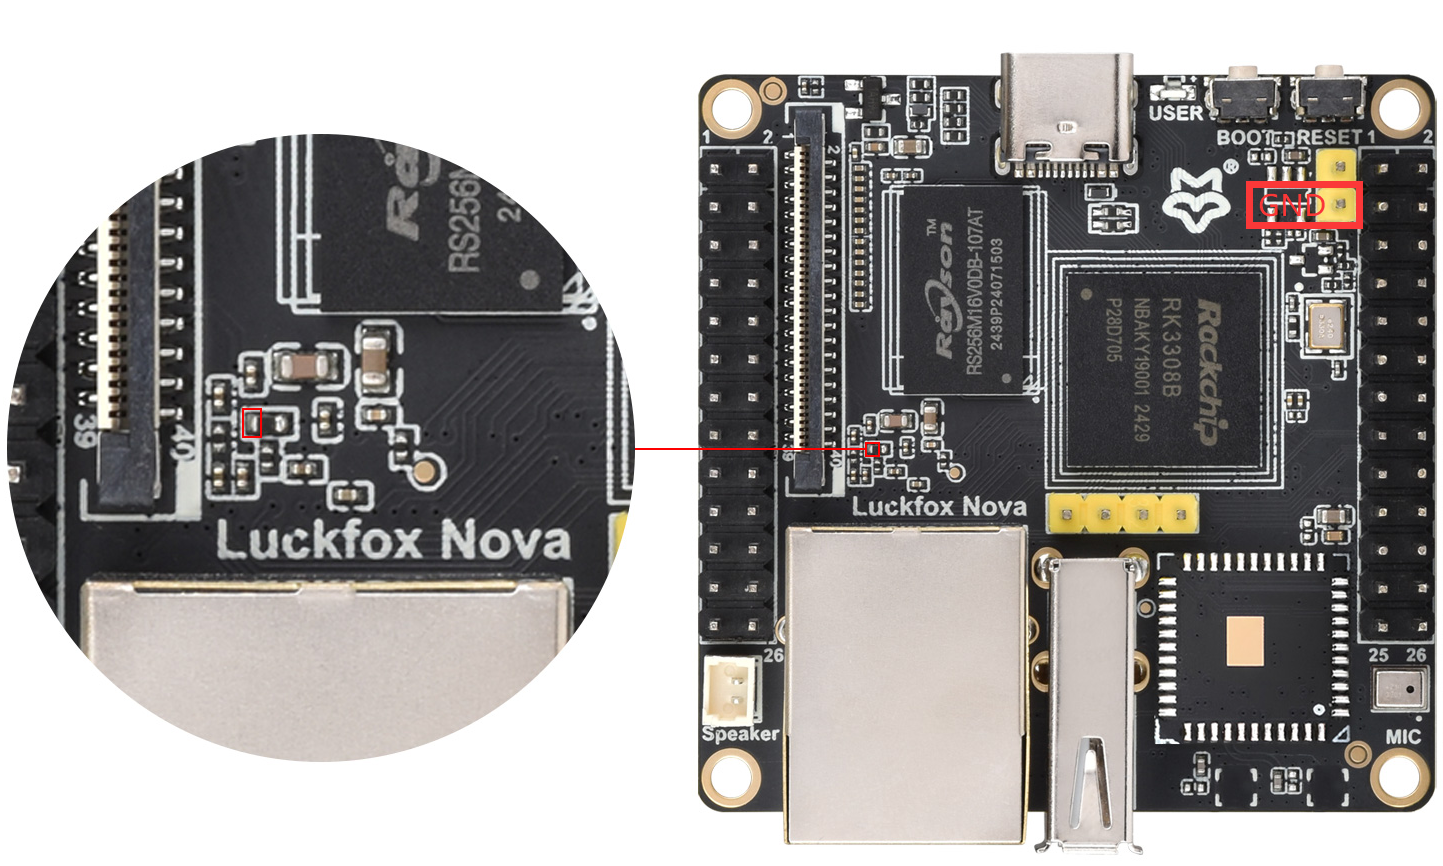
Connect the development board to the computer. Release the short-circuit connection after the Rockchip flashing tool displays "Found One MASKROM Device".
5. eMMC Image Flashing
Ensure that the development board has entered the Loader mode or the Maskrom mode.
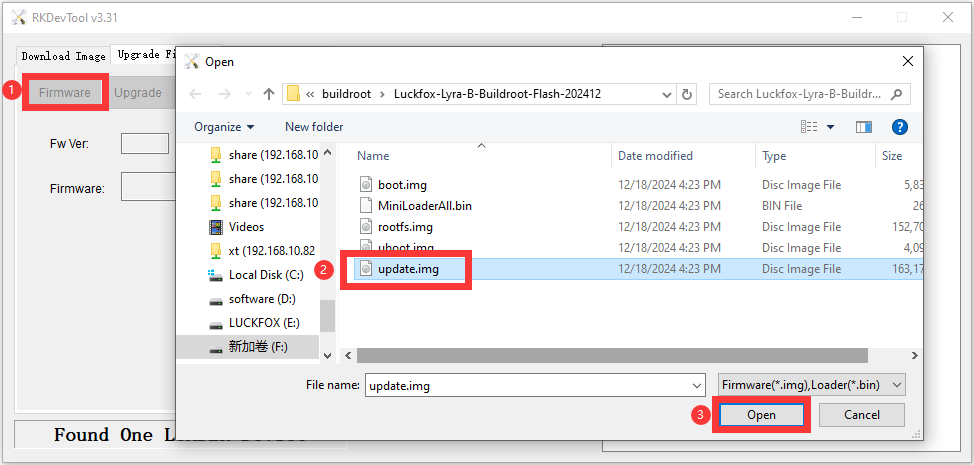
5.1 Image Flashing in the Windows Environment
- Click on "Fiemware", select the path of the system image, and open the update.img image file.
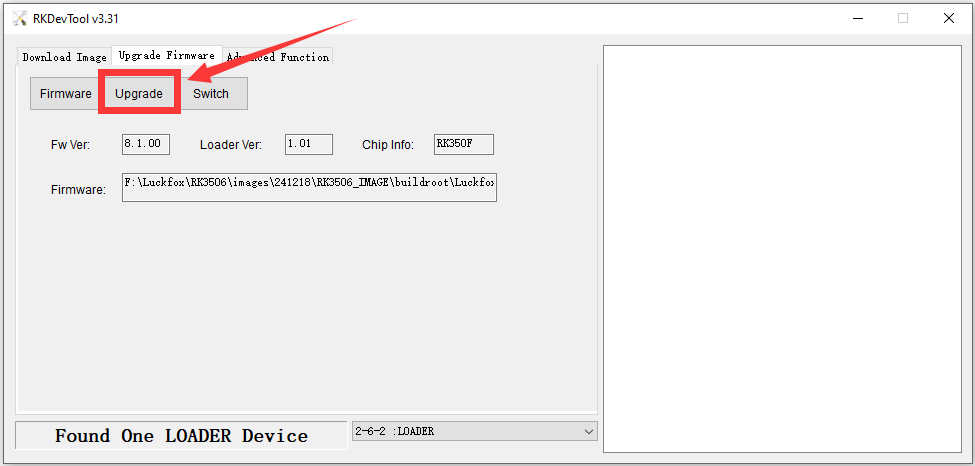
- After opening it, you need to wait until the image is successfully loaded, and then click "Upgrade".
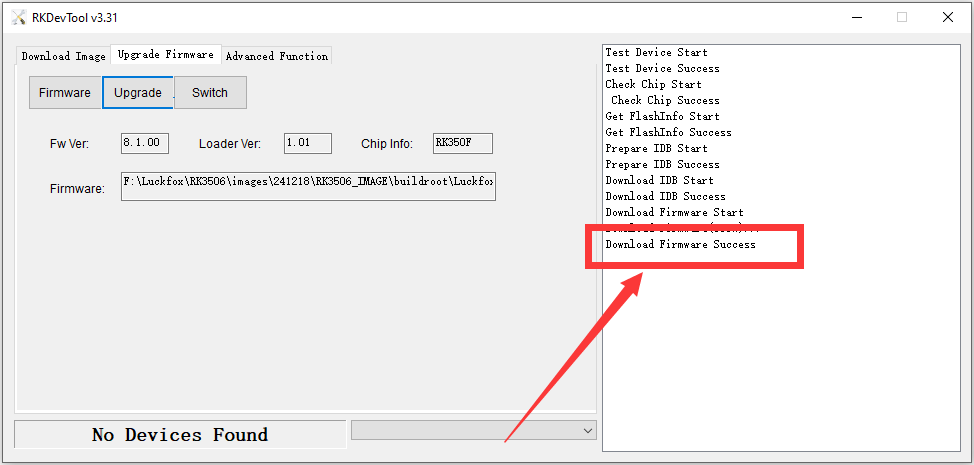
- After the flashing is completed, you will see the message "Download Successful" at this time.
5.2 Image Flashing in the Linux Environment
- Press the boot button and connect to the host. Use the
lsusbcommand to check the device. If the device is not recognized, try to solve the problem by replacing the Type-C cable.- The development board is in the "ADB" mode.

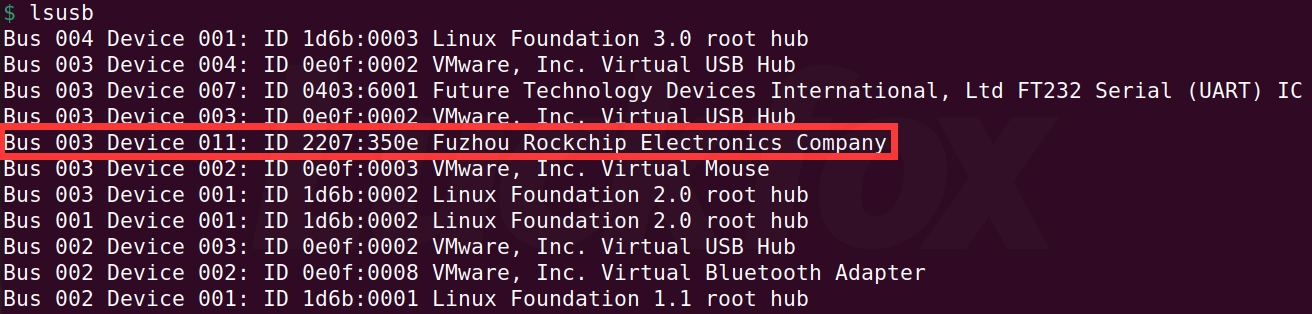
- The development board is in the "LOADER" mode.
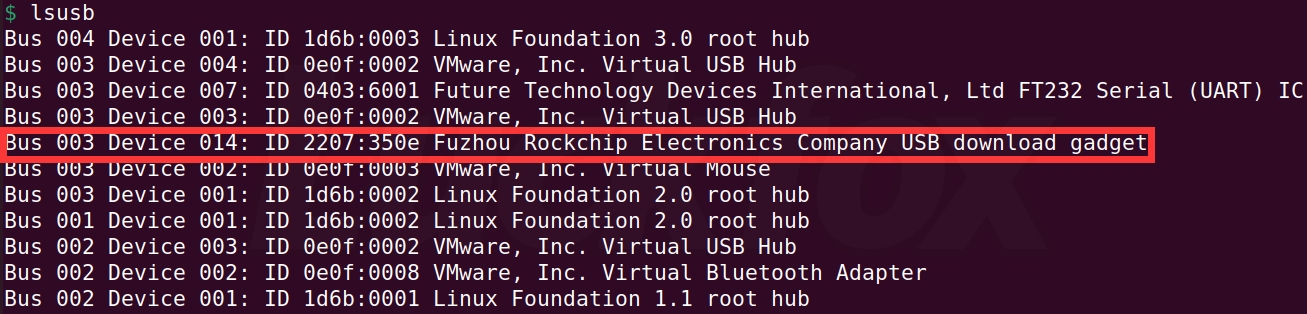
- The development board is in the "MASKROM" mode.
- The development board is in the "ADB" mode.
- The flashing can only be carried out when the development board is in the
LOADERorMASKROMmode. - Download and extract the SDK. For the specific operation method of obtaining the SDK, refer to the chapter "SDK Development Environment Setup".
- Execute the script with administrator privileges.SDK Directory/rkflash.sh
$ sudo ./rkflash.sh update
  [sudo] password for ubuntu:
  Using /home/ubuntu/sdk/tools/linux/Linux_Upgrade_Tool/Linux_Upgrade_Tool/config.ini
  Loading firmware...
  Support Type:350F	FW Ver:8.1.00	FW Time:2024-12-13 19:40:06
  Loader ver:1.01	Loader Time:2024-12-13 18:35:14
  Start to upgrade firmware...
  Test Device Start
  Test Device Success
  Check Chip Start
  Check Chip Success
  Get FlashInfo Start
  Get FlashInfo Success
  Prepare IDB Start
  Prepare IDB Success
  Download IDB Start
  Download IDB Success
  Download Firmware Start
  Download Image... (100%)
  Download Firmware Success
  Upgrade firmware ok
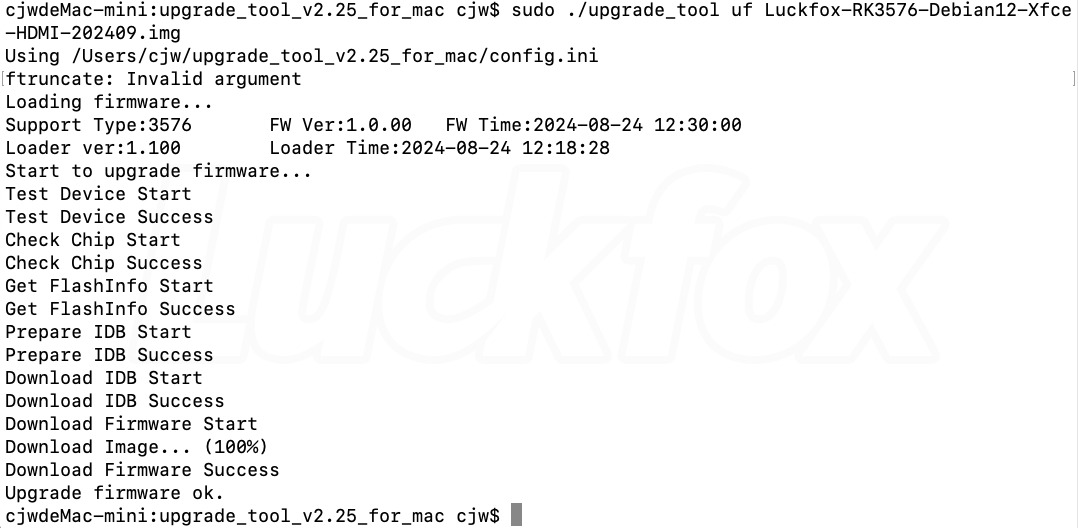
5.3 Image Flashing in the macOS Environment
- Download and extract the Upgrade_Tool flashing tool(click here to download).
- Run the program to flash the firmware (please modify the path according to the actual storage location of the image):
$ cd upgrade_tool_v2.3_mac
sudo ./upgradetool uf Luckfox-xxx-xxx.img - The result is as follows: