SD Card Image Burning
when using these two boards, users need to manually burn the operating system onto an SD card to ensure the proper functioning of the system.
Equipment Preparation
- Windows 10 (PC)
- LuckFox WebBee development board
- 100M/1000M Ethernet cable, and a router
- USB card reader and SD card(The capacity is 8GB or more)
- Before disassembling the casing, first peel off the sticker, then loosen the screws securing the casing,

Driver Installation
- Download the RK Driver Assistant (click here to download).
- Open the RK Driver Assistant and install the USB driver. No need to connect anything during this process. Restart your computer after the installation is complete.
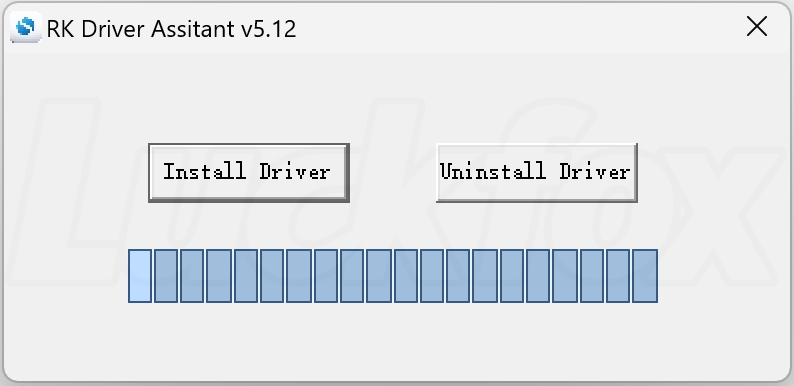
Image Download
Provides SD card firmware for LuckFox WebBee, as well as SPI FLASH firmware for LuckFox WebBee.
| Version | Description | Download |
|---|---|---|
| Buildroot/Ubuntu | Firmware for LuckFox WebBee | Google Cloud Link |
SD Card Image Burning
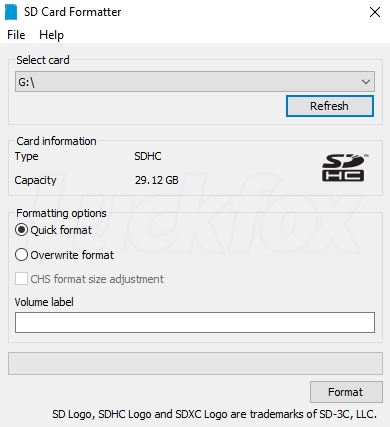
- Download the TF card formatting tool SD Card Formatter and extract it. Install it with a single click.
- Select the TF card drive letter and click "Format" (Make sure to remove other TF cards to prevent data loss).
SD Card Flashing
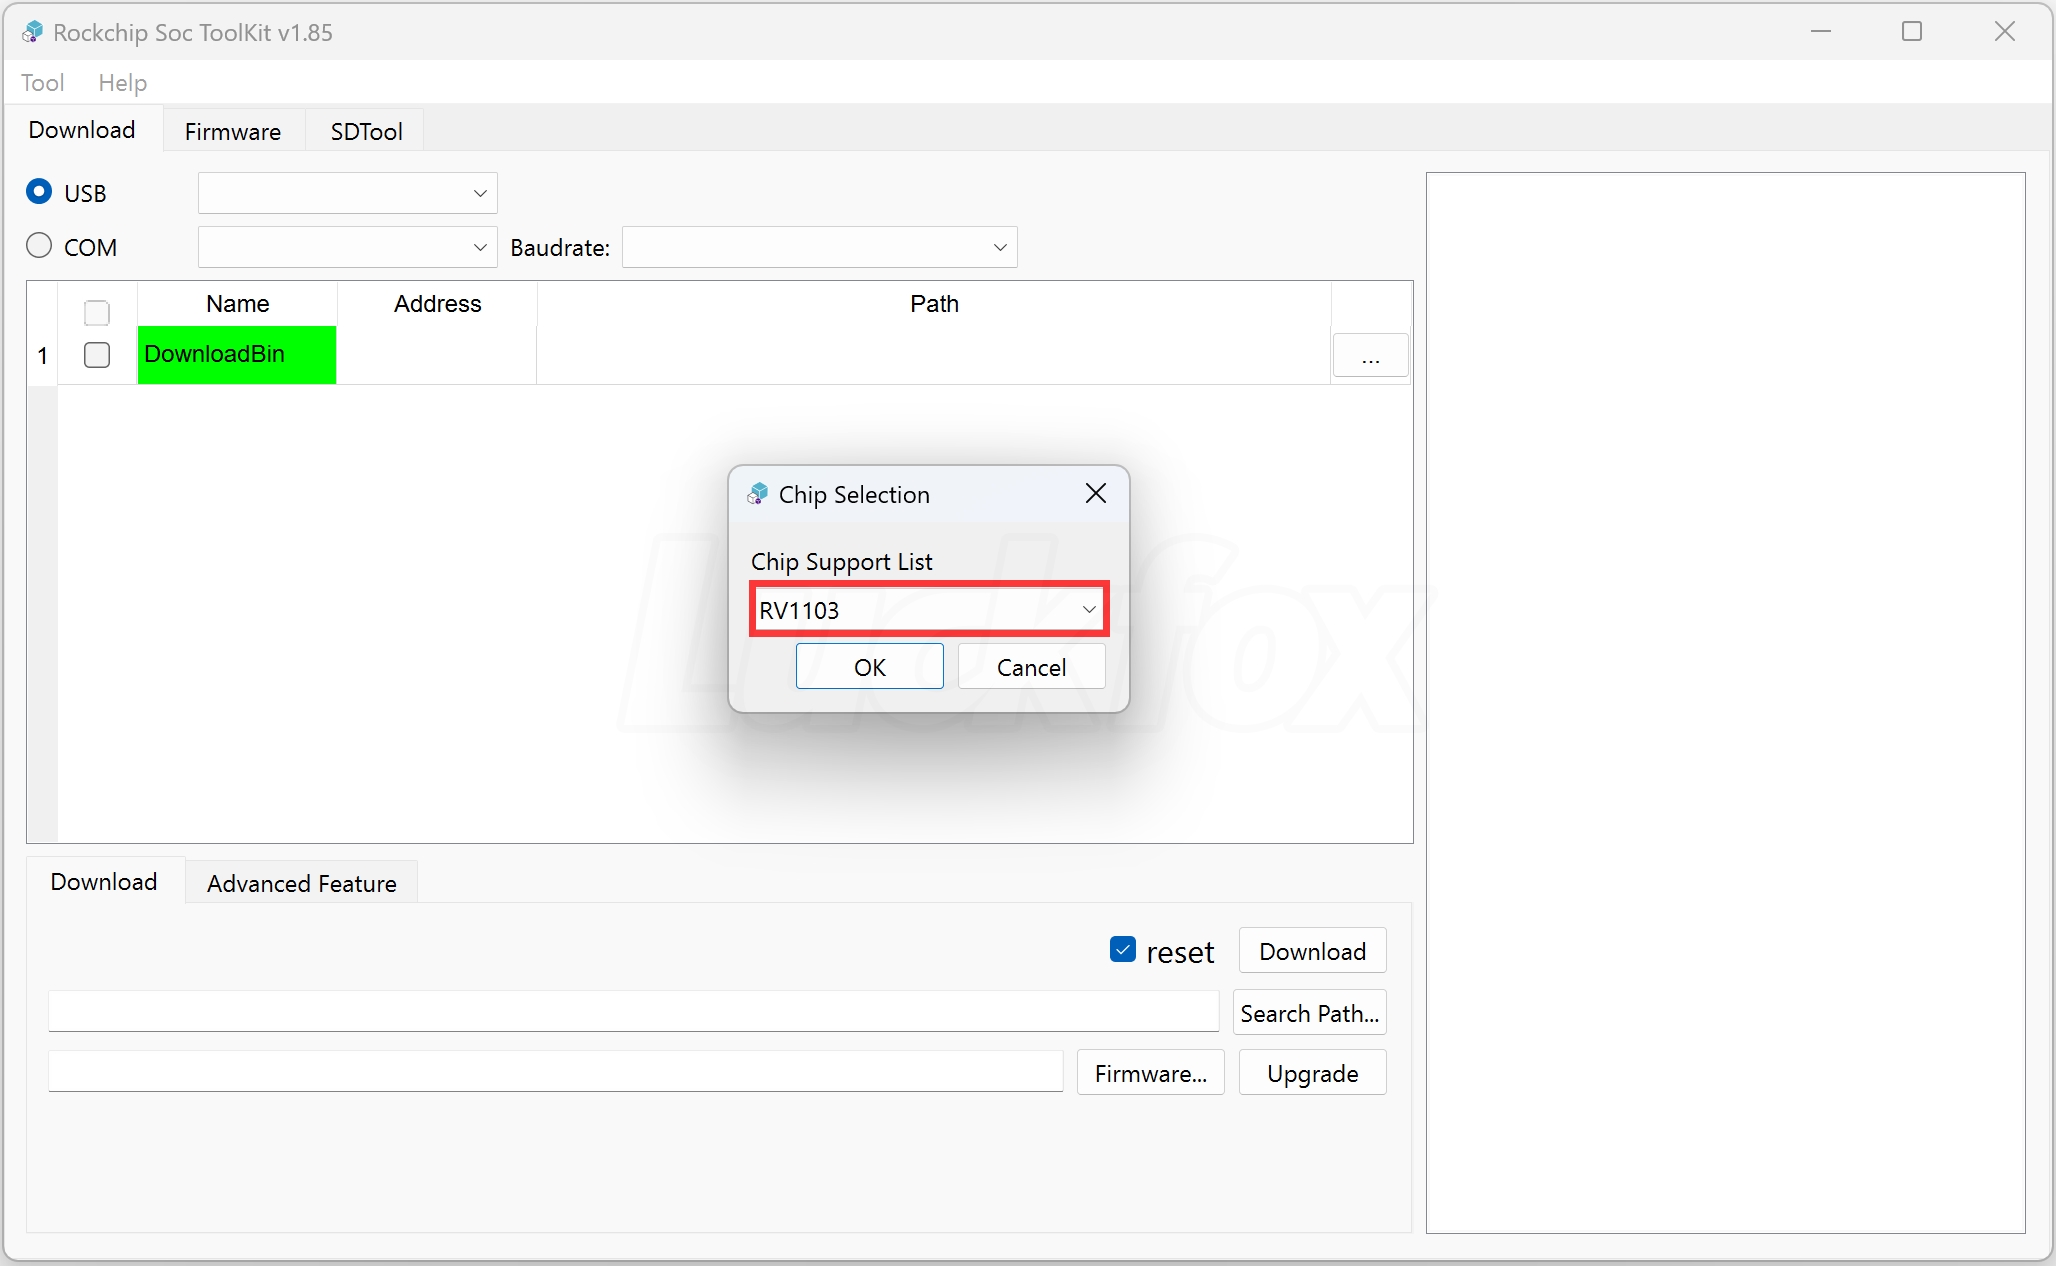
Download and unzip the burning tool (Click here to download).
Open the software (right-click and run as administrator),Select RV1103.
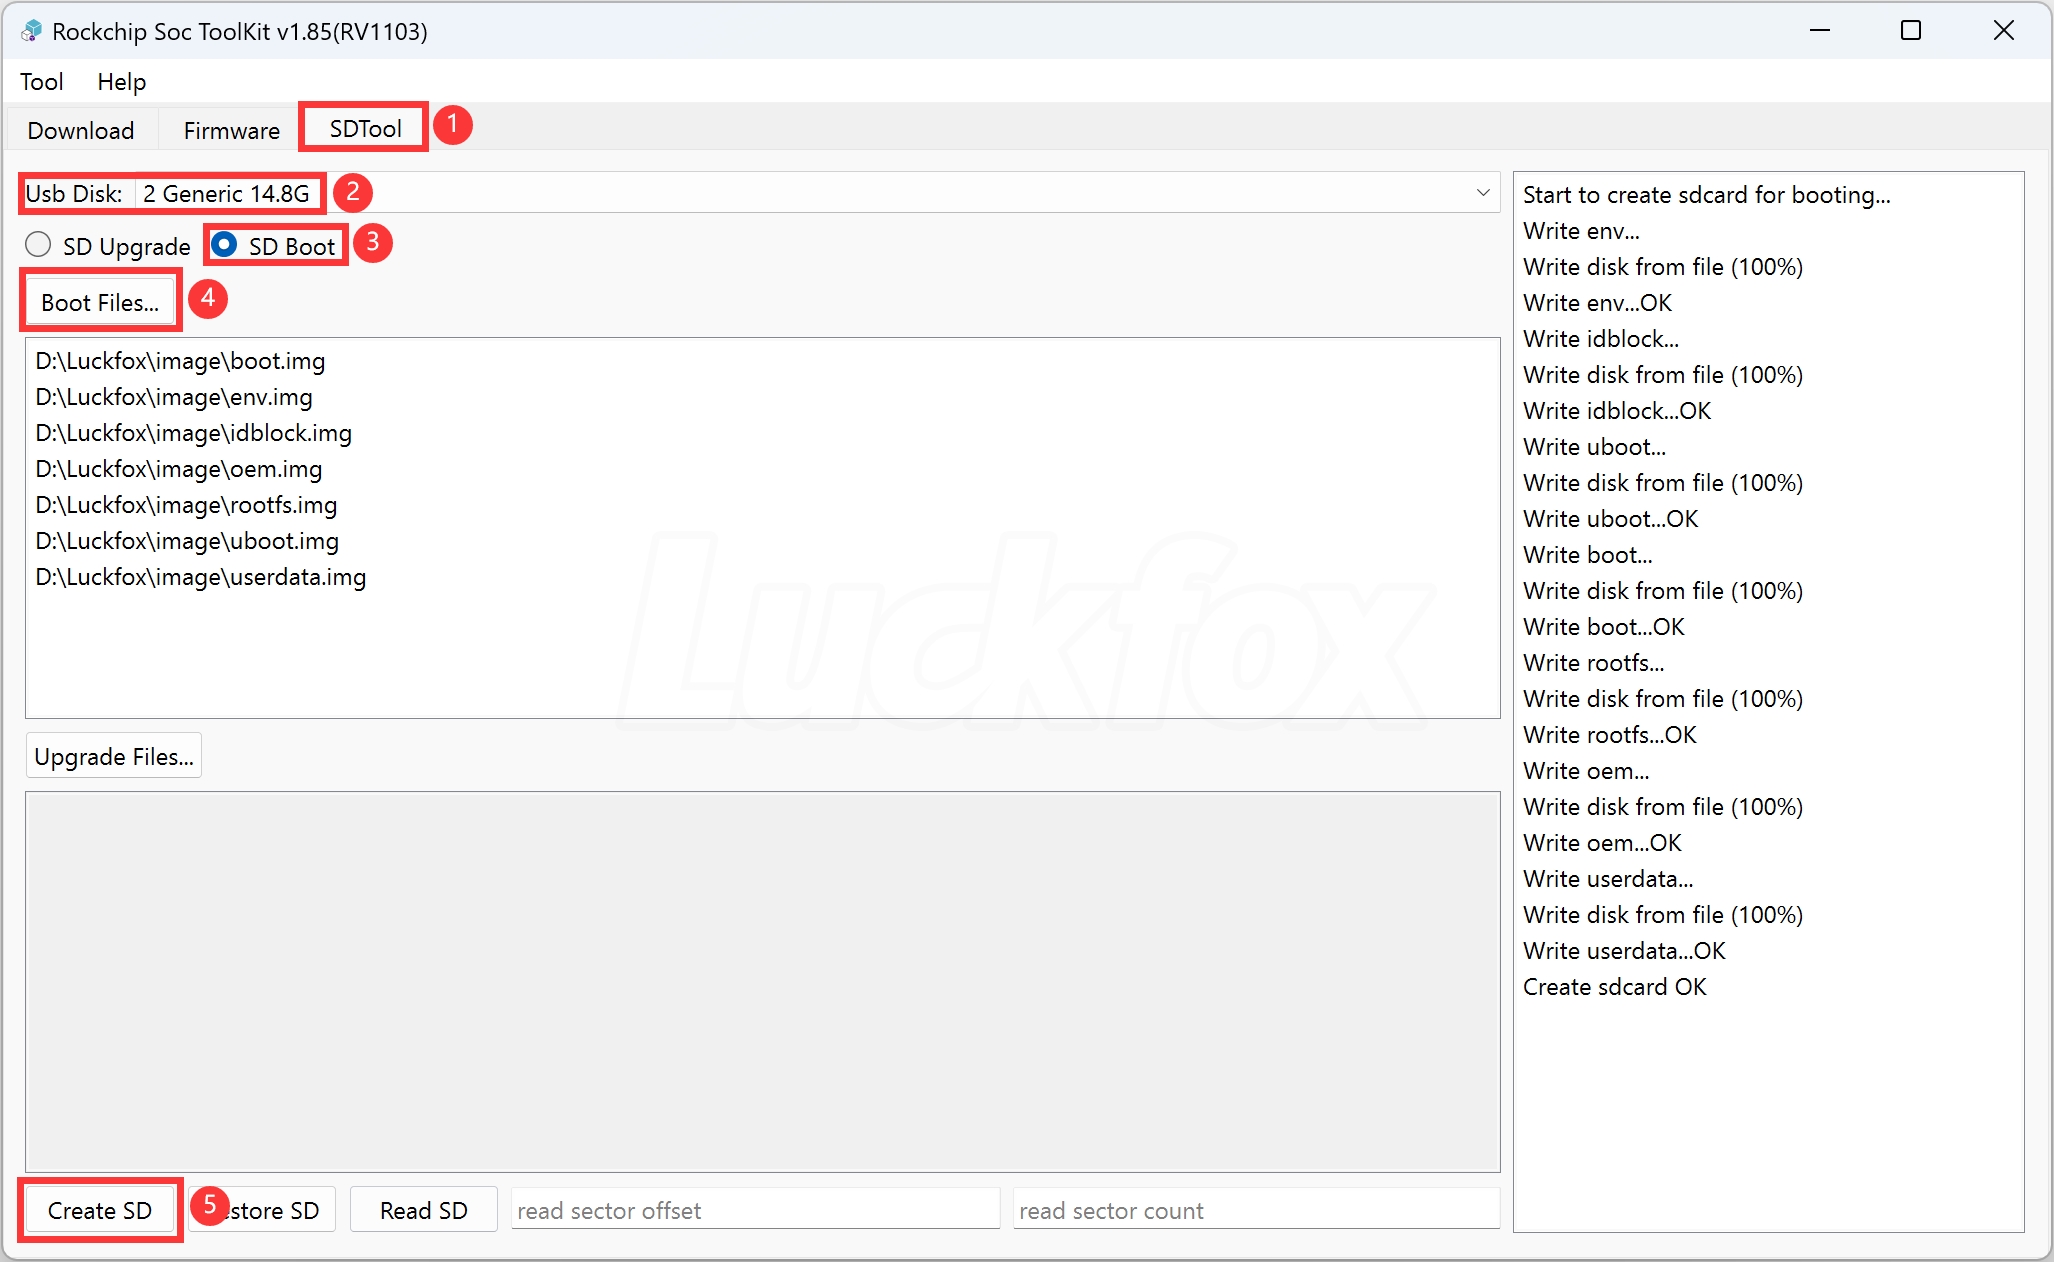
Steps to download firmware for LuckFox WebBee on Windows:
a. Choose the SD card tool.
b. The SD card size will be displayed under USB Disk. If not displayed, reinsert the card reader.
c. Select SD card booting.
d. Import the boot file.(Note: The startup files do not include update.img)
e. Click "Create SD Card".