Image Flashing
1. Preparation
The factory-installed image is primarily used to test the normal operation of the development board's interface functions and is updated infrequently. To ensure proper usage of the development board, users are advised to burn the system image provided on the network disk using a USB Type-A to Type-C data cable after receiving the board. For Luckfox Lyra series development boards, the storage medium rules vary by version:
- Lyra B/Plus Version: Features 256MB onboard SPI NAND Flash, allowing users to choose between Flash or TF card as the storage medium.
- Ultra Version: Utilizes an eMMC storage solution and does not support TF cards.
- Base Version: Lacks onboard Flash and requires image burning to a TF card via a card reader. It only supports booting from a TF card and does not support direct on-board burning.
2. Image Download
Lyra Plus provides an image tailored for DSI displays. Users can download the image file based on their specific needs. The naming convention for images is as follows:Luckfox-(Board Model)-(Board System)-(Storage Medium)-(Update Date)
Board Model: Lyra, Lyra B, Lyra Plus and Lyra Ultra/Ultra W
Board System: Ubuntu, Buildroot
Storage Medium: SPI NAND FLASH and TF Card and eMMC
Officially Supported Image Download
| Version | Description | Download |
|---|---|---|
| Buildroot | Supports burning to three storage media: SPI NAND FLASH, TF card, and eMMC. | Google Drive Download Link |
Community-Supported Image Download
| Version | Description | Download |
|---|---|---|
| Ubuntu22.04 | Supports burning to two storage media: TF card, and eMMC. | Google Drive Download Link |
3. Installing Drivers
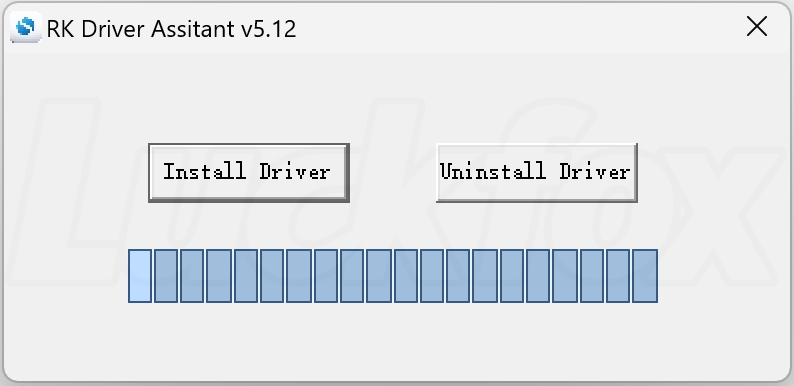
Download the RK Driver Assistant DriverAssitant-RK Driver Assistant and the flashing tool RKDevTool.
Open RK Driver Assistant to install the USB drivers. This process does not require the board to be connected. Restart your computer after installation is complete.
3.1 Entering Upgrade Mode
Loader Mode and MaskRom Mode are two common upgrade modes for devices, used to load firmware or boot programs.
Loader Mode loads via software-level boot programs, typically for firmware upgrades.
MaskRom Mode is a hardware-level boot mode, used for factory flashing or device recovery.
3.1.1 Loader Mode
The development board comes with a pre-installed testing image to verify functionality. Upon receiving the board, users must reflash a new image. Before reflashing the system, switch the board to either Loader Mode or MaskRom Mode. Loader Mode is recommended for most cases.
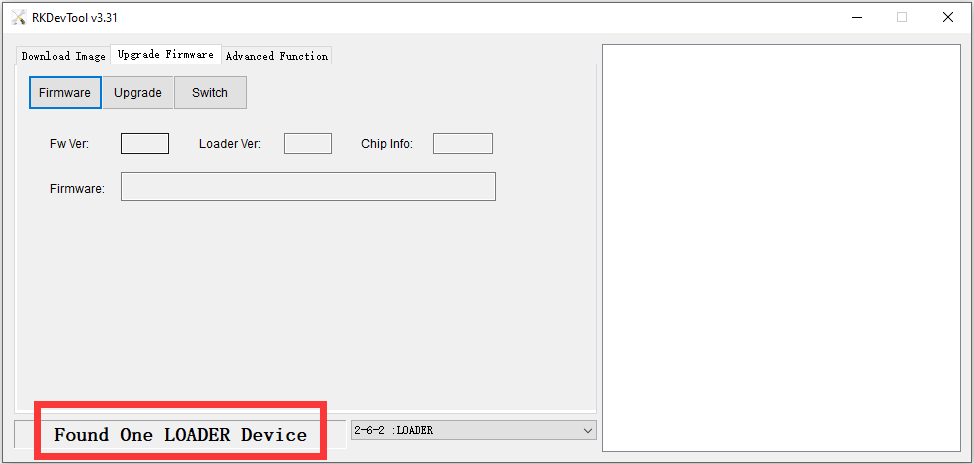
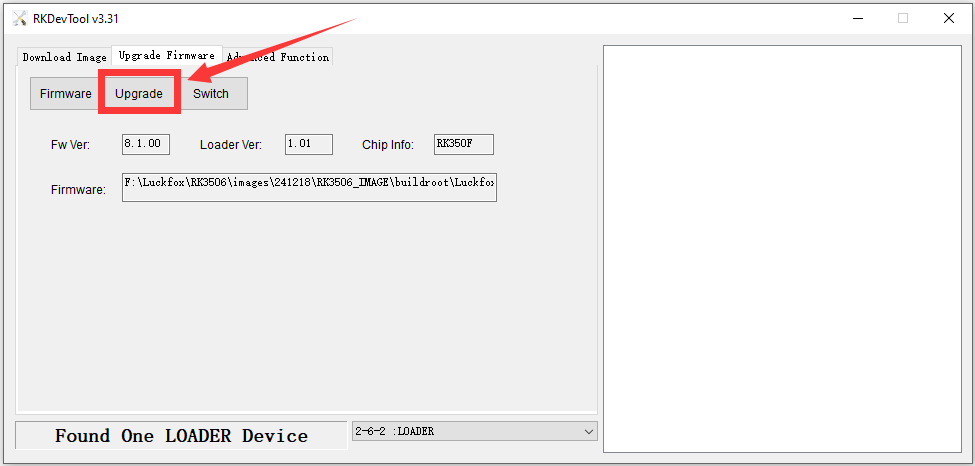
Open the RKDevTool tool.
Hold the BOOT button while connecting the board to your computer. Release the BOOT button after connecting. When the tool displays the message
Found One LOADER Device, you can proceed with flashing.If already connected, you can hold RESET, then press and hold BOOT. Release RESET and wait for the tool to detect the Loader Mode device before releasing BOOT.
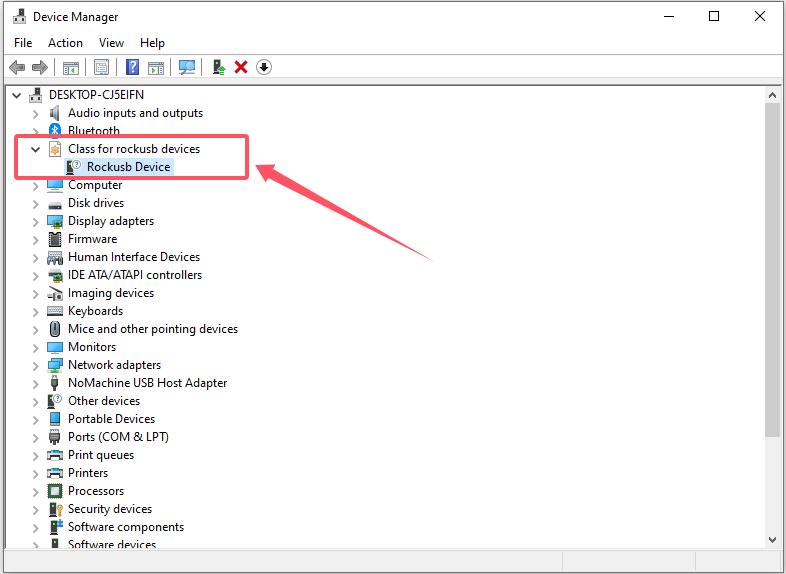
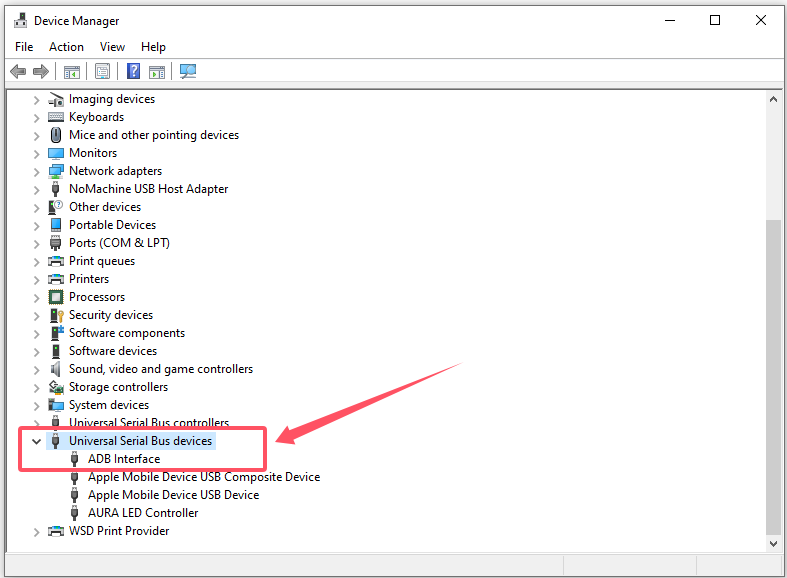
Note: If the device is not detected as a Loader Device, check the device manager to ensure the board is recognized correctly. The device manager should display:
- Flashing Mode:
- Non-Flashing Mode (with normal kernel boot, LED blinking):
- Flashing Mode:
3.1.2 MaskRom Mode (Use with Caution)
If the device cannot enter Loader Mode, try forcing MaskRom Mode:
- Connect the board and open RKDevTool.
- Disconnect power, short the FSPI_CLK / eMMC_CLK and GND pins on the Flash chip, then reconnect USB. Once the flashing software detects the device, remove the short connection.


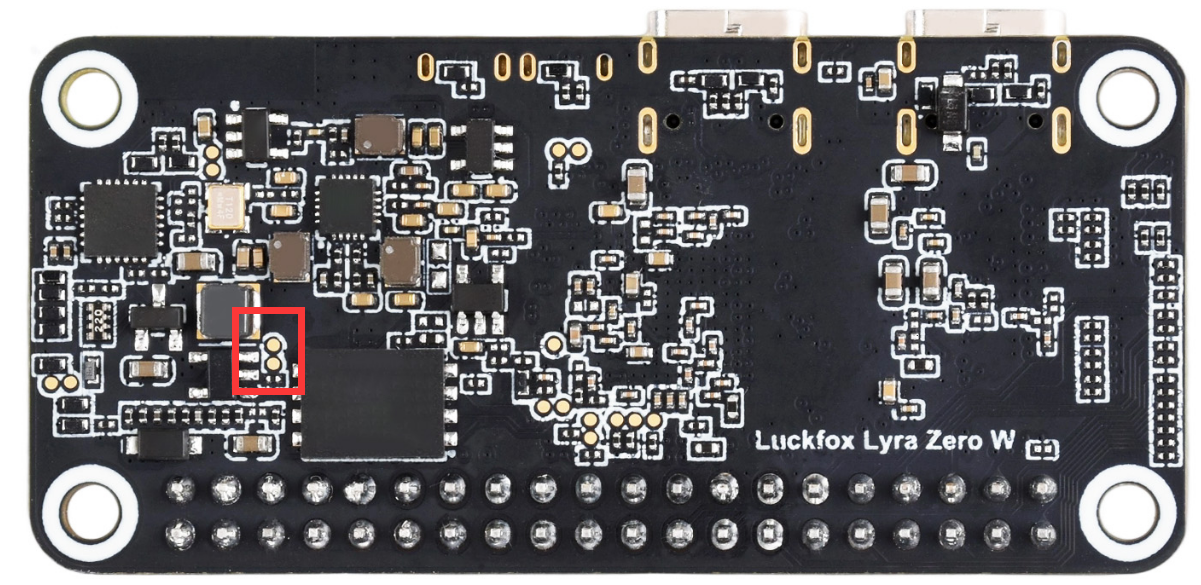
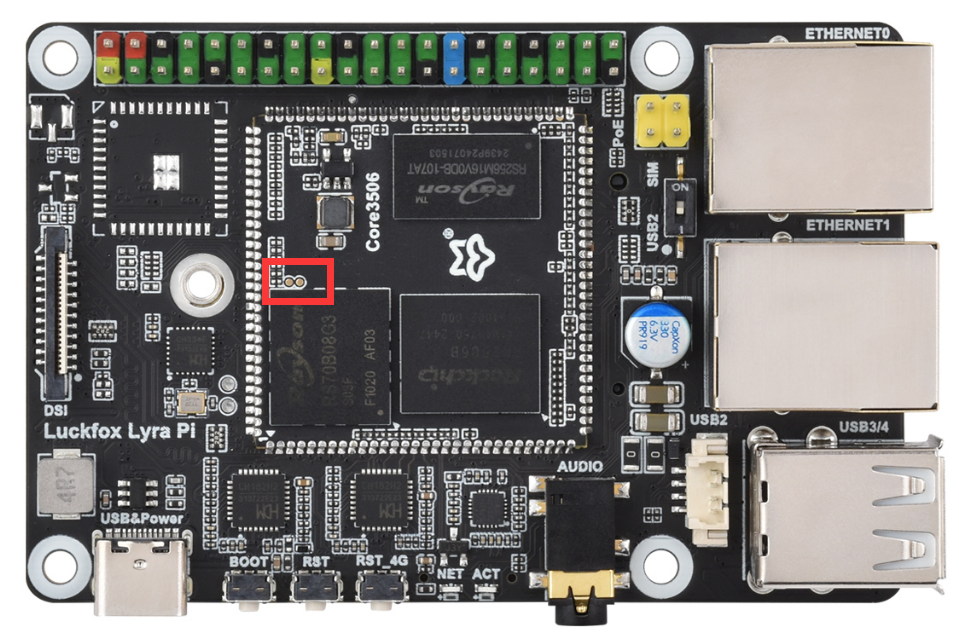
- Power on the board. The tool should display
Found One MASKROM Device. After flashing, remove the jumper cap.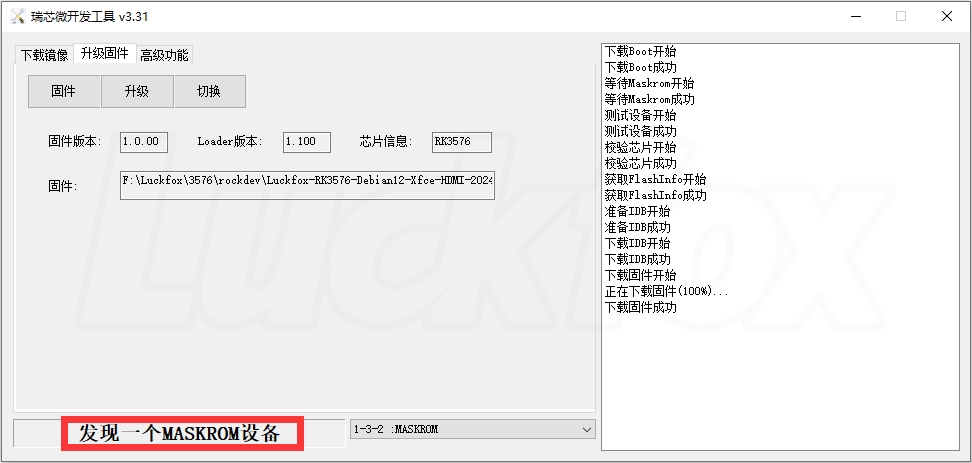
4. Flashing Images (FLASH and eMMC)
4.1 Windows
Flashing an Image
Open RKDevTool. Ensure the device is in
MASKROM/LOADER mode. Click Firmware, select the image path, and load theupdate.imgfile.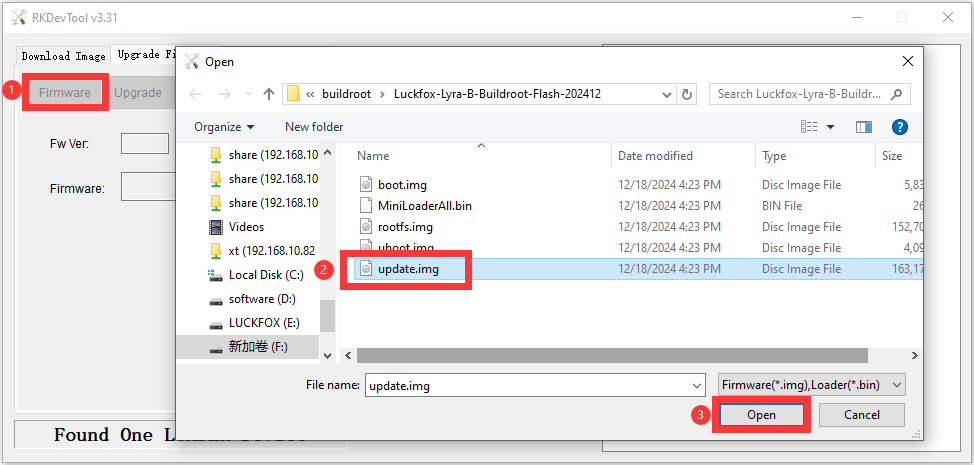
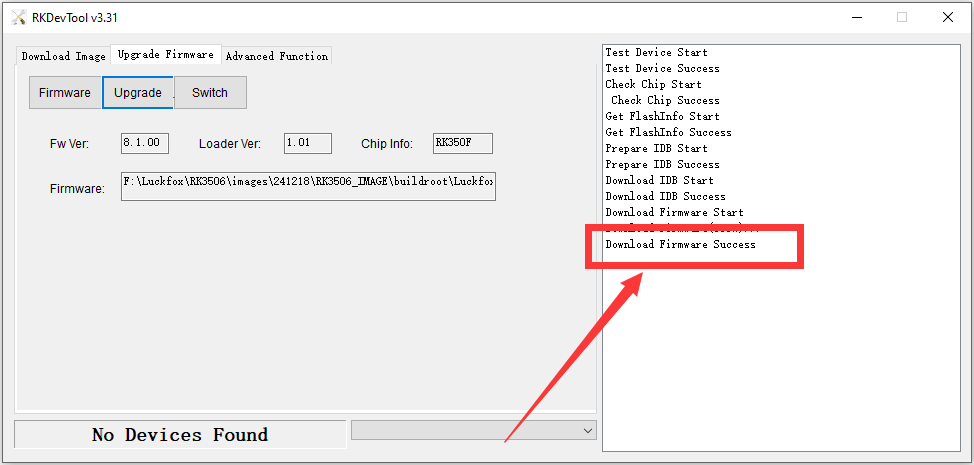
Wait for the image to load, then click Upgrade.
Once completed, the tool will display Download Successful.
4.2 Linux(X86_64 Platform)
Upgrade_Tool is a command-line tool for flashing raw firmware, RK firmware, and partition images to eMMC under Linux. This closed-source tool from Rockchip supports flashing only to SPI NAND FLASH. For TF card flashing, use SDDiskTool on Windows. The rkflash.sh script and Upgrade_Tool are included in the SDK, which is recommended to run on Ubuntu 22.04 (testing is done on this version).
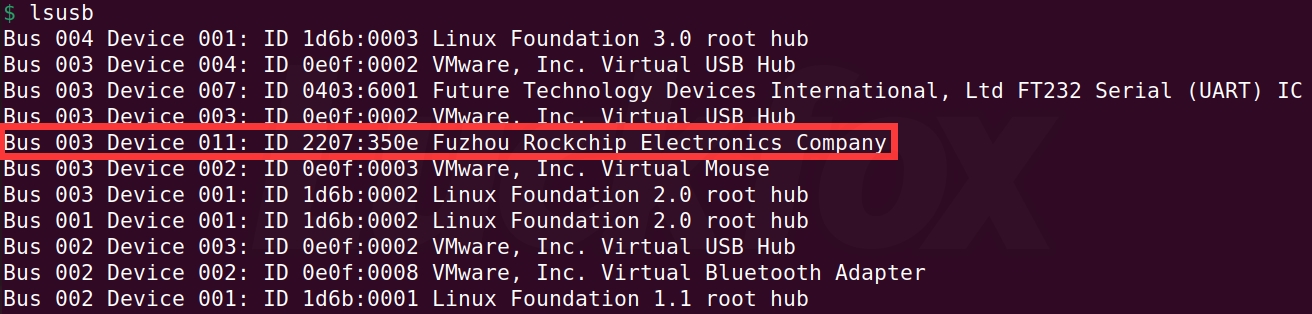
- Hold the BOOT button while connecting the board to the host. Use
lsusbto check for device recognition. Replace the Type-C cable if the device is not detected.- "ADB" mode:
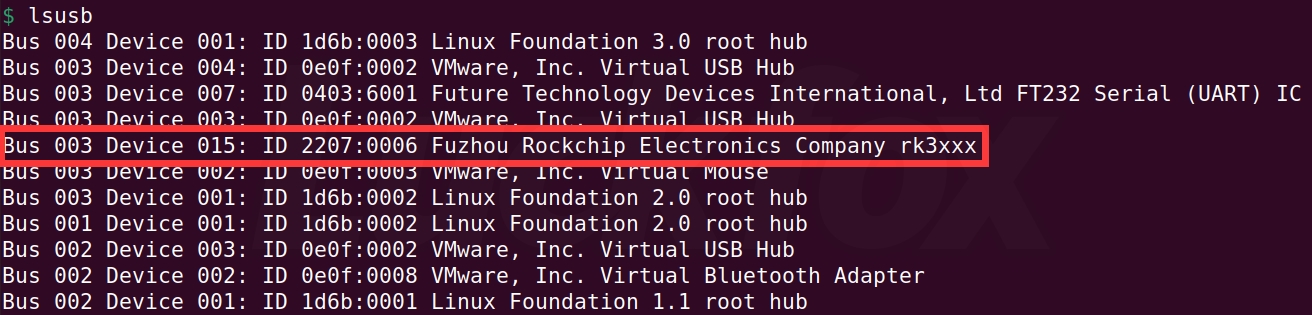
- "LOADER" mode:
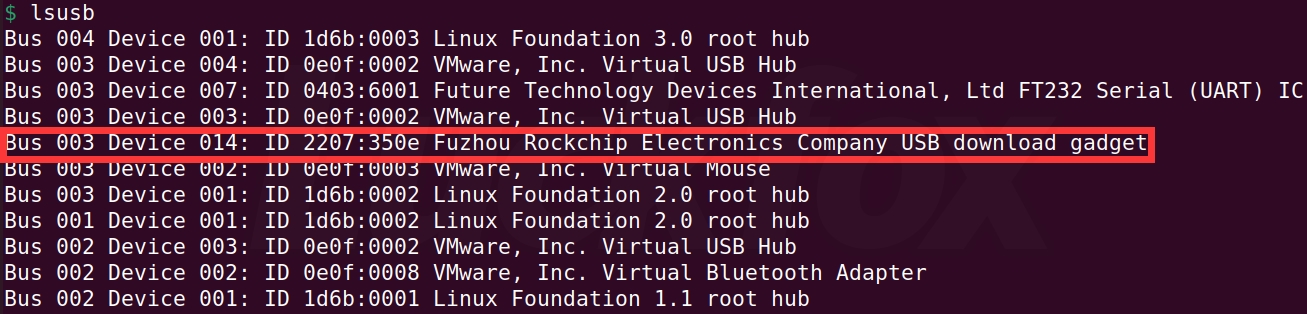
- "MASKROM" mode:
- "ADB" mode:
Flashing can only be performed when the Lyra main unit is in "LOADER" or "MASKROM" mode.
Download and extract the SDK. For specific operations, refer to the《Setting Up SDK Development Environment》section.
$ ls -l
total 3124652
drwxrwxr-x  4 ubuntu ubuntu       4096 12月 13 17:16 app
drwxrwxr-x 19 ubuntu ubuntu       4096 12月 13 18:35 buildroot
lrwxrwxrwx  1 ubuntu ubuntu         39 12月 13 17:16 build.sh -> device/rockchip/common/scripts/build.sh
lrwxrwxrwx  1 ubuntu ubuntu         22 12月 13 17:19 common -> device/rockchip/common
drwxrwxr-x  3 ubuntu ubuntu       4096 12月 13 17:16 device
drwxrwxr-x  8 ubuntu ubuntu       4096 12月 13 17:16 docs
drwxrwxr-x 16 ubuntu ubuntu       4096 12月 13 17:16 external
drwxrwxr-x 11 ubuntu ubuntu       4096 12月 13 17:16 hal
lrwxrwxrwx  1 ubuntu ubuntu         10 12月 13 17:17 kernel -> kernel-6.1
drwxrwxr-x 27 ubuntu ubuntu       4096 12月 13 19:39 kernel-6.1
lrwxrwxrwx  1 ubuntu ubuntu         31 12月 13 17:16 Makefile -> device/rockchip/common/Makefile
drwxrwxr-x  7 ubuntu ubuntu       4096 12月 13 19:40 output
drwxrwxr-x  3 ubuntu ubuntu       4096 12月 13 17:17 prebuilts
lrwxrwxrwx  1 ubuntu ubuntu         32 12月 13 17:19 README.md -> device/rockchip/common/README.md
-rw-r--r--  1 ubuntu ubuntu 3199580732 12月 13 17:09 repo_1213.tar.gz
drwxrwxr-x 10 ubuntu ubuntu       4096 12月 13 18:35 rkbin
lrwxrwxrwx  1 ubuntu ubuntu         41 12月 13 17:16 rkflash.sh -> device/rockchip/common/scripts/rkflash.sh
lrwxrwxrwx  1 ubuntu ubuntu         15 12月 13 19:40 rockdev -> output/firmware
drwxrwxr-x 15 ubuntu ubuntu       4096 12月 13 17:17 rtos
drwxrwxr-x  6 ubuntu ubuntu       4096 12月 13 17:17 tools
drwxrwxr-x 28 ubuntu ubuntu       4096 12月 13 18:35 u-boot
drwxrwxr-x  8 ubuntu ubuntu       4096 12月 13 17:17 yocto
Execute the script with administrator privileges.
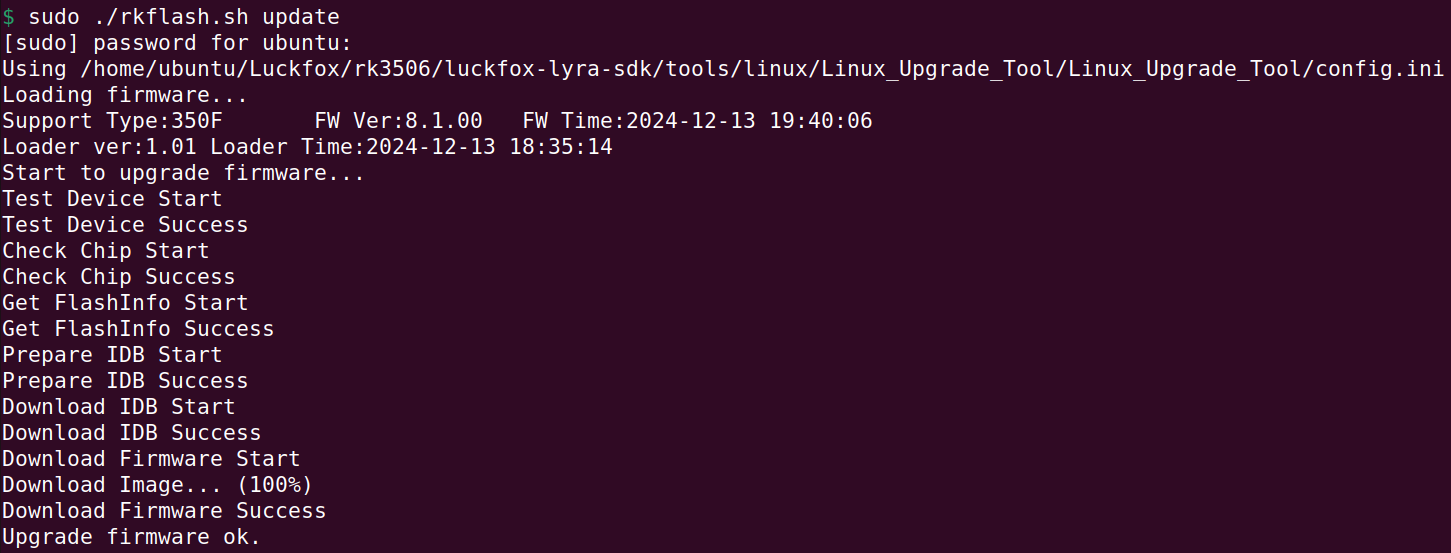
$ sudo ./rkflash.sh update
[sudo] password for ubuntu:
Using /home/ubuntu/Luckfox/rk3506/luckfox-lyra-sdk/tools/linux/Linux_Upgrade_Tool/Linux_Upgrade_Tool/config.ini
Loading firmware...
Support Type:350F   FW Ver:8.1.00   FW Time:2024-12-13 19:40:06
Loader ver:1.01 Loader Time:2024-12-13 18:35:14
Start to upgrade firmware...
Test Device Start
Test Device Success
Check Chip Start
Check Chip Success
Get FlashInfo Start
Get FlashInfo Success
Prepare IDB Start
Prepare IDB Success
Download IDB Start
Download IDB Success
Download Firmware Start
Download Image... (100%)
Download Firmware Success
Upgrade firmware ok.
Expected results:
4.3 Mac OS
Download and extract upgrade_tool:
sudo ditto -xk upgrade_tool_v2.3_mac.zip .Run the program to flash the firmware (please modify the path according to the actual location of the image):
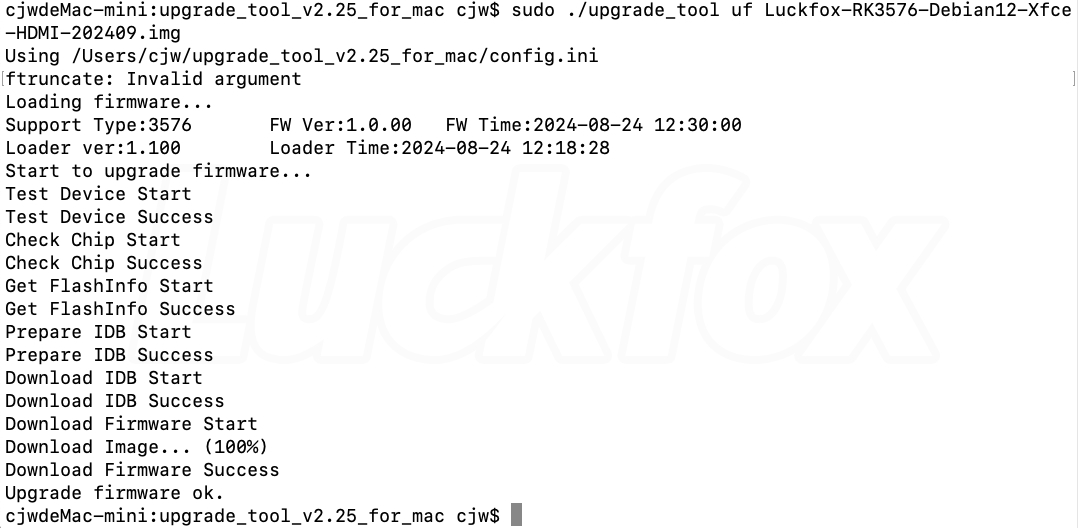
cd upgrade_tool_v2.3_mac
sudo ./upgrade_tool uf Luckfox-RK3576-Debian12-Xfce-HDMI-202409.img
he result will be as follows:
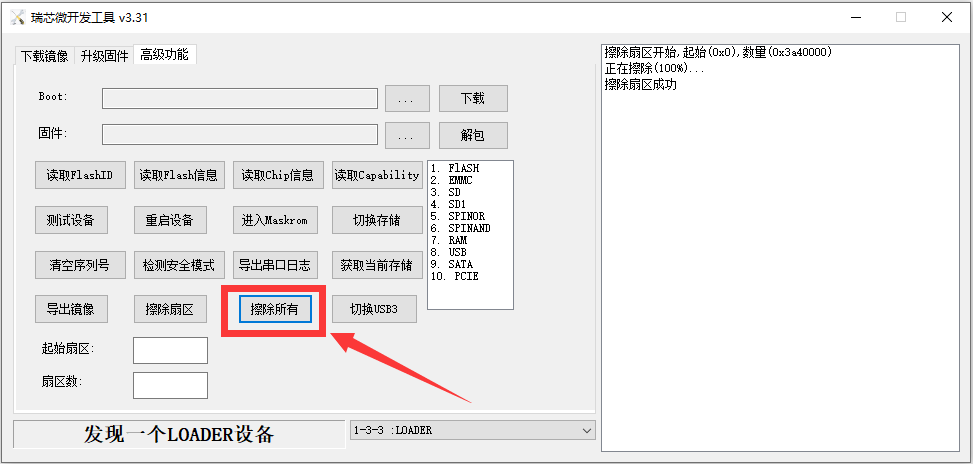
4.4 Image Erasure
- To erase data in the eMMC, select the update.img firmware and click Erase Flash:
5. TF Card Image Flashing
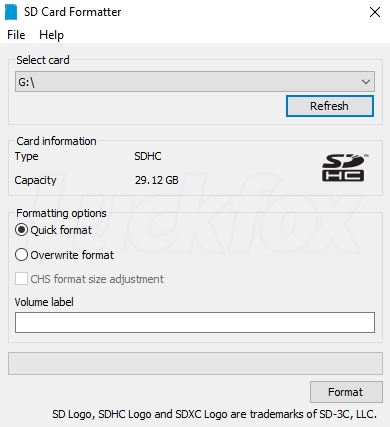
Download the TF card erasure tool SD Card Formatter, extract and install it with one click.
Select the TF card drive letter and click Format (be sure to remove other TF cards to avoid data loss)
Download the TF card flashing tool SDDiskTool, extract and use without installation.
