QT Environment Setup
1. Introduction to Qt
Qt is a powerful cross-platform application and user interface development framework, originally developed by Trolltech, a Norwegian company, and now maintained by Qt Company. On December 8, 2020, the company released Qt 6, the latest version. Qt is written in C++ and supports various programming languages through language bindings, making it an ideal choice for building high-quality, cross-platform applications.
As a one-stop development solution, Qt is not limited to graphical user interface (GUI) development. It also supports modules for command-line tools, network communication, multithreading, audio-video processing, file operations, and more. Qt is widely used for desktop, embedded, and mobile application development. In real-world applications, its flexibility and efficiency are well-proven. For example, the main interface of the Linux version of WeChat is developed using Qt, while the web rendering component is implemented with GTK, demonstrating Qt's ability to integrate with other technology stacks.
Qt is applied across a broad range of fields, from desktop software (e.g., VirtualBox, Battle.net client) to embedded devices (e.g., consumer electronics, industrial controls), and even modern cross-platform development needs. Its modular design and excellent cross-platform support make it a top choice for developers creating high-quality applications, cementing its core position in both open-source and commercial development.
2. Why C++?
- C++ is a compiled language that offers superior runtime performance, making it suitable for scenarios requiring high performance and low latency, such as embedded devices, backend logic processing, and complex algorithm computation.
- For complex logic involving system calls, large-scale multithreading, or network communication, C++ provides powerful language features and flexible control.
- If a project requires reusing existing C++ libraries or interacting with low-level hardware, using C++ directly reduces the need for additional adaptation work.
In practice, many projects use both—QML for frontend interface development and C++ for implementing core logic and performance-critical components. The introduction of QML in Qt 5 is an additional option, not a mandatory choice.
3. Qt Versions
Commercial Edition:
The commercial edition requires a paid license and is suitable for companies and developers who want to develop proprietary software without sharing the source code.
Open Source Edition:
The open-source edition is released under the GNU Lesser General Public License (LGPL) and the GNU General Public License (GPL). Users can use Qt for free but must comply with the terms of these licenses
Historical Versions:
Version Release Year Key Features Qt 1.x 1996 Initial release focused on the X11 platform Qt 2.x 1999 Added support for Microsoft Windows Qt 3.x 2001 Introduced new features, including network and XML support Qt 4.x 2005 Major improvements enhancing cross-platform support and the graphics view framework Qt 5.x 2012 Focused on modern hardware performance, introduced QML and Qt Quick for fluid animations and touch interfaces Qt 6.x 2020 Enhanced performance and functionality, optimized for future software development trends, including 3D graphics support
This tutorial will guide you in setting up a Qt 5 environment in a Buildroot system. Although Qt 6 offers significant updates and improvements, such as better support for modern C++ standards and optimized graphics engines, Qt 5 still has advantages like broader compatibility, mature stability, extensive third-party library support, comprehensive documentation, and an active community.
4. Installing Qt (PC Ubuntu 22.04 Environment)
Download the Qt installer:
- Official website:https://download.qt.io/archive/qt/5.12/5.12.9/
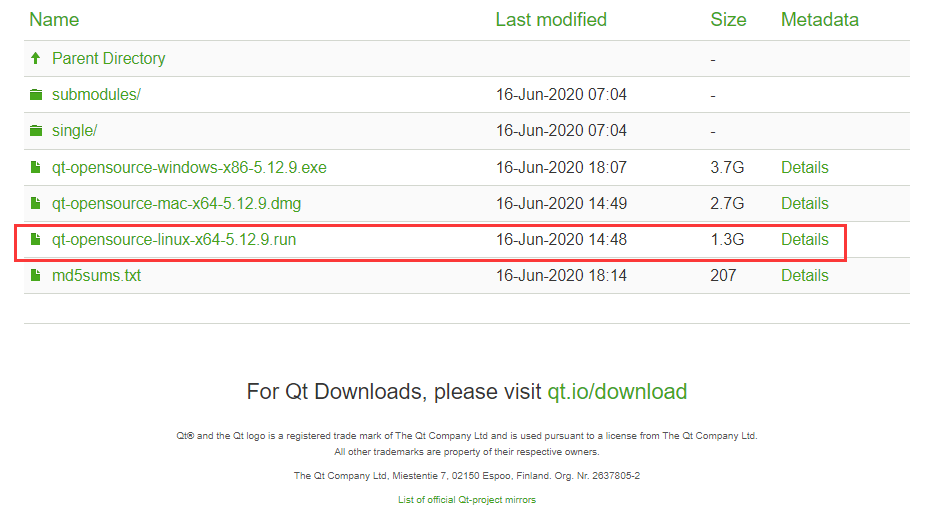
- Official website:https://download.qt.io/archive/qt/5.12/5.12.9/
Alternative sources if the official site is inaccessible:
Source Link Google Download
Register on the Qt official website using your email address:
https://login.qt.io/loginTransfer the installer to the Ubuntu system:If you want to skip login during installation, disconnect from the internet.
chmod +x qt-opensource-linux-x64-5.12.9
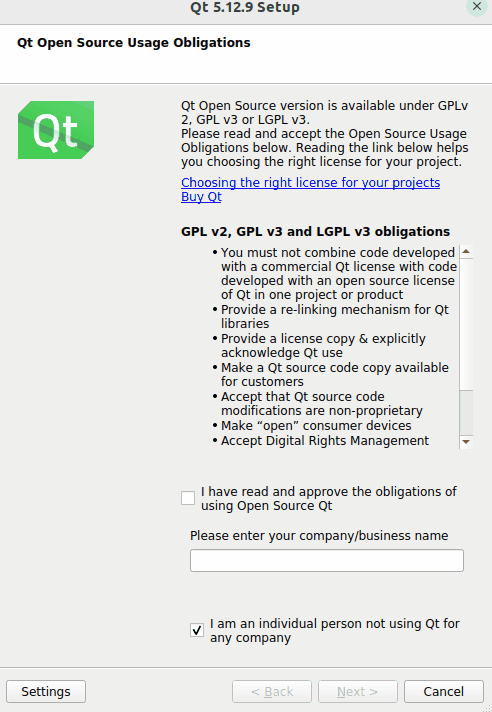
./qt-opensource-linux-x64-5.12.9Installation Process:
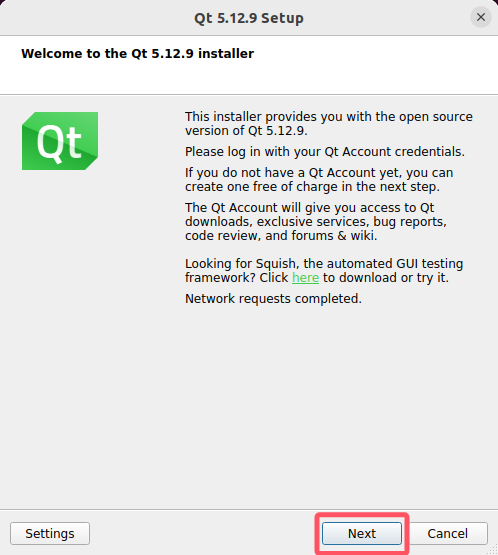

Follow the steps shown in the installer interface.
5. Adding Qt 5 to Buildroot
Refer to the "SDK Environment Deployment" section for detailed steps on configuring Buildroot to include Qt 5.
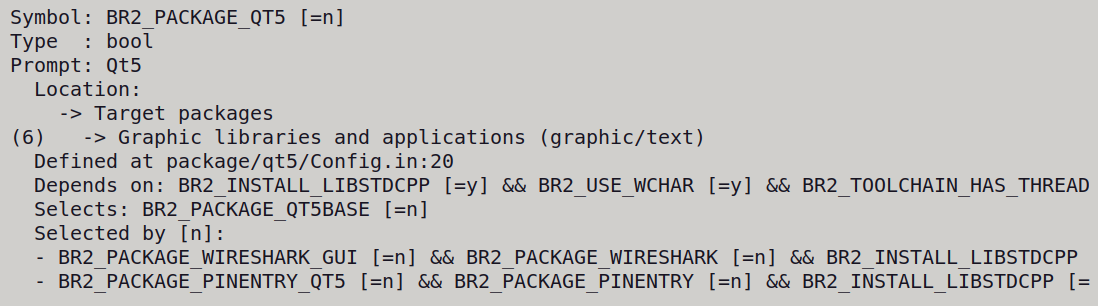
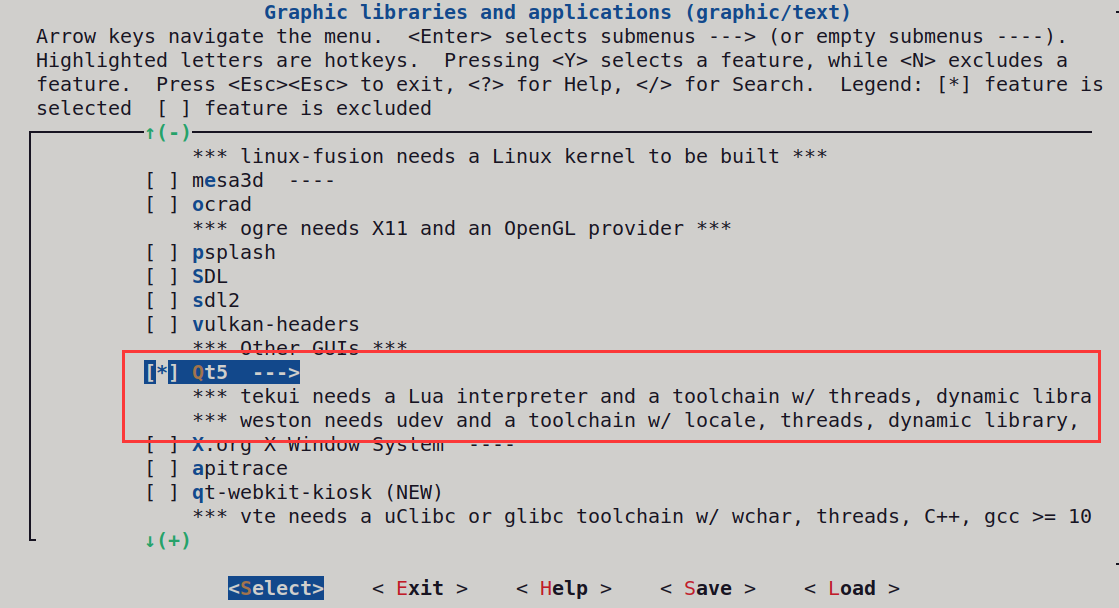
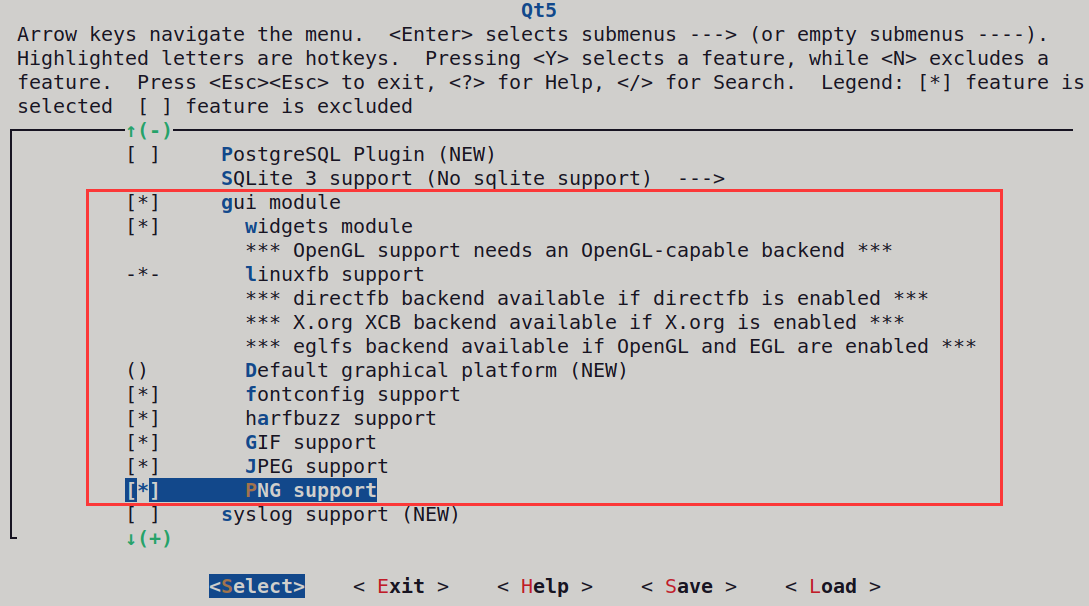
- Add QT5 in buildroot.
6. Configuring qmake
Create
qt.confin the qmake directory:cd /SDK目录/buildroot/output/rockchip_rk3506_luckfox/build/qt5base-da6e958319e95fe564d3b30c931492dd666bfaff/qmake
cp ~/Qt5.12.9/5.12.9/gcc_64/bin/qt.conf .
vim qt.conf
# Add the following lines:
[Paths]
Prefix=..Update the qmake symbolic link path:
sudo apt install qtchooser -y
luckfox@luckfox:~$ which qmake
usr/bin/qmake

 sudo rm /usr/bin/qmake
sudo ln -s /SDK目录/buildroot/output/rockchip_rk3506_luckfox/build/qt5base-da6e958319e95fe564d3b30c931492dd666bfaff/qmake/qmake /usr/bin/qmake
Update environment variables:
vim ~/.bashrc

export PATH=/home/ubuntu/Luckfox/rk3506/luckfox-lyra-sdk/buildroot/output/rockchip_rk3506_luckfox/host/arm-buildroot-linux-gnueabihf/lib:$PATH

source ~/.bashrc
Check qmake version:
(base) luckfox@luckfox:~$ qmake -v
QMake version 3.1
Using Qt version 5.15.11 in /home/ubuntu/Luckfox/rk3506/luckfox-lyra-sdk/buildroot/output/rockchip_rk3506_luckfox/host/arm-buildroot-linux-gnueabihf/sysroot/home/usr/lib
7. Configuring Cross-Compiler
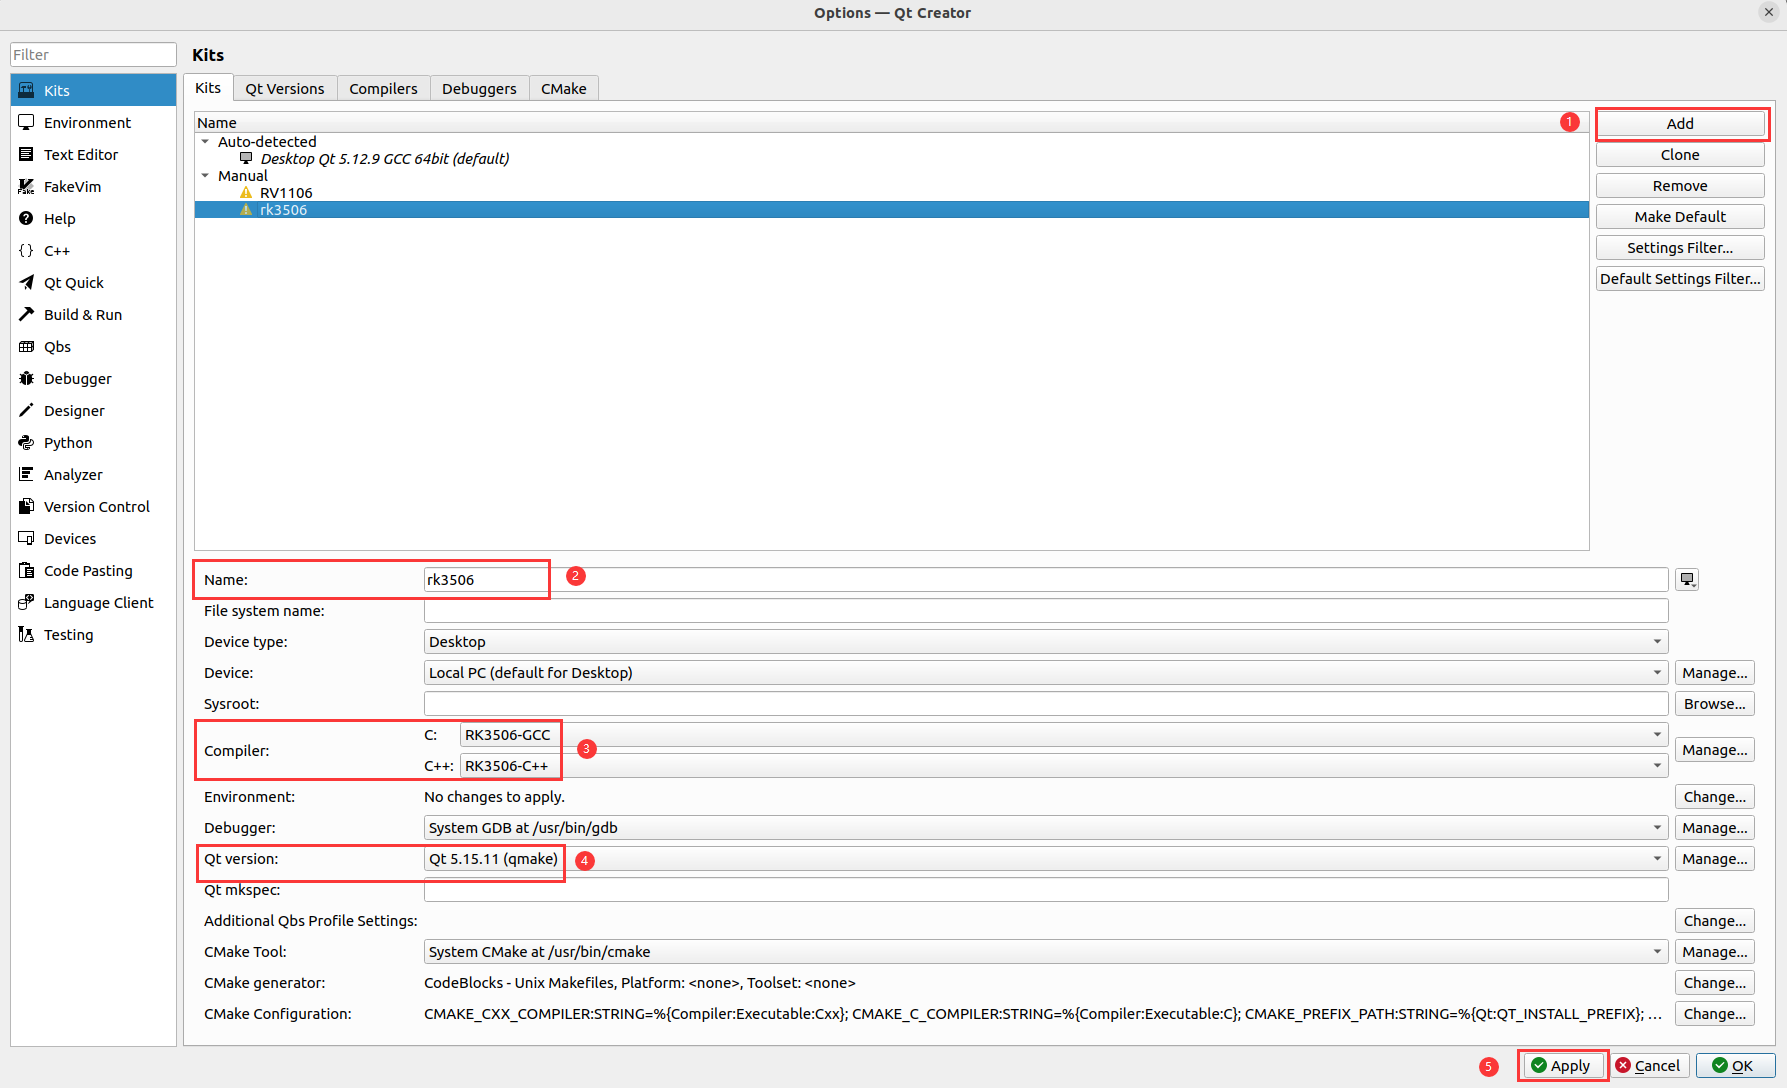
- Open Qt Creator and navigate to Tools > Options > Compilers.
- Add the GCC and G++ compilers with appropriate paths.
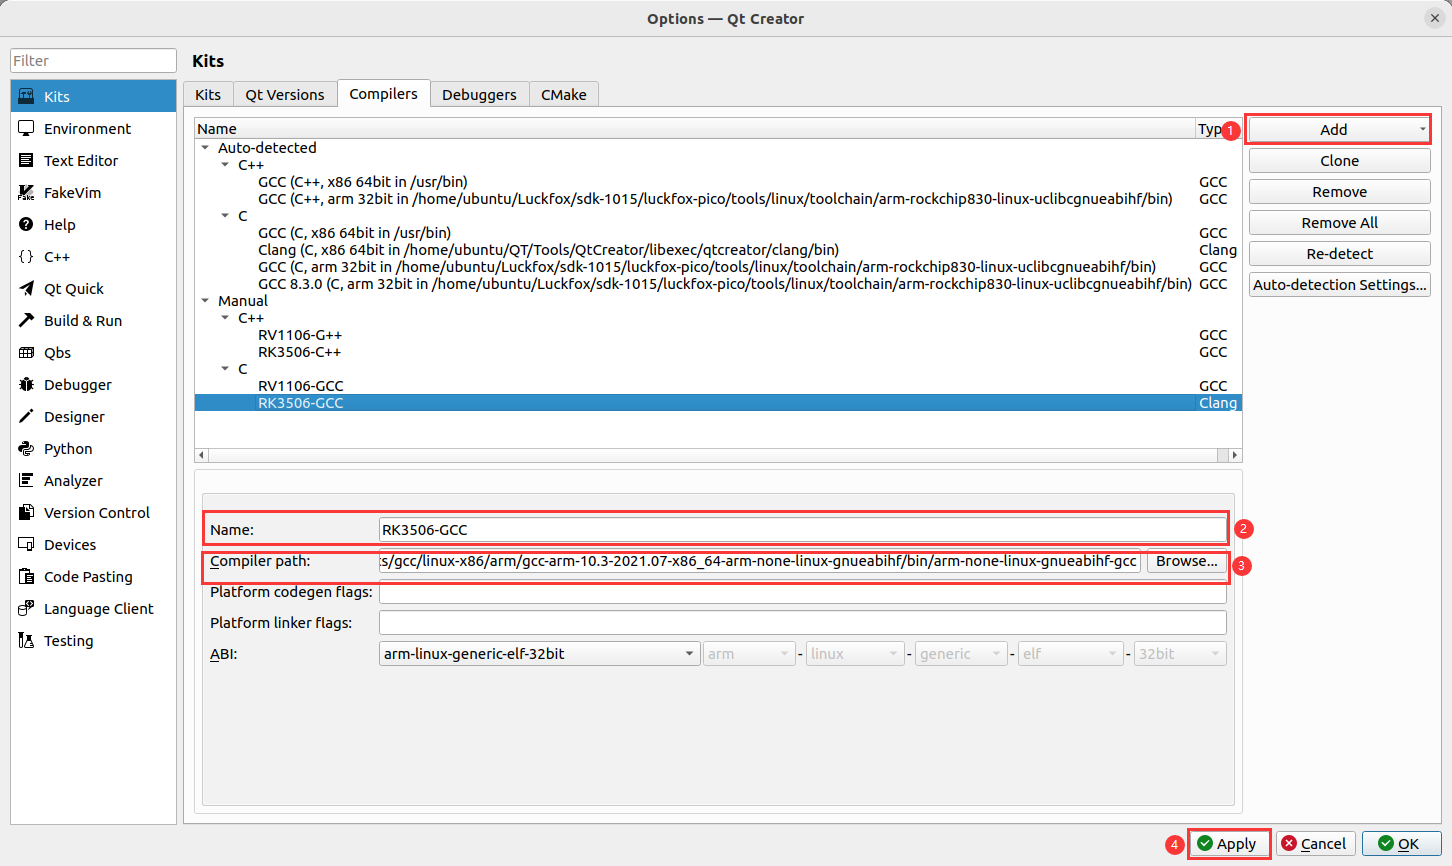
- Add 3506 G++ Name and Compiler Path

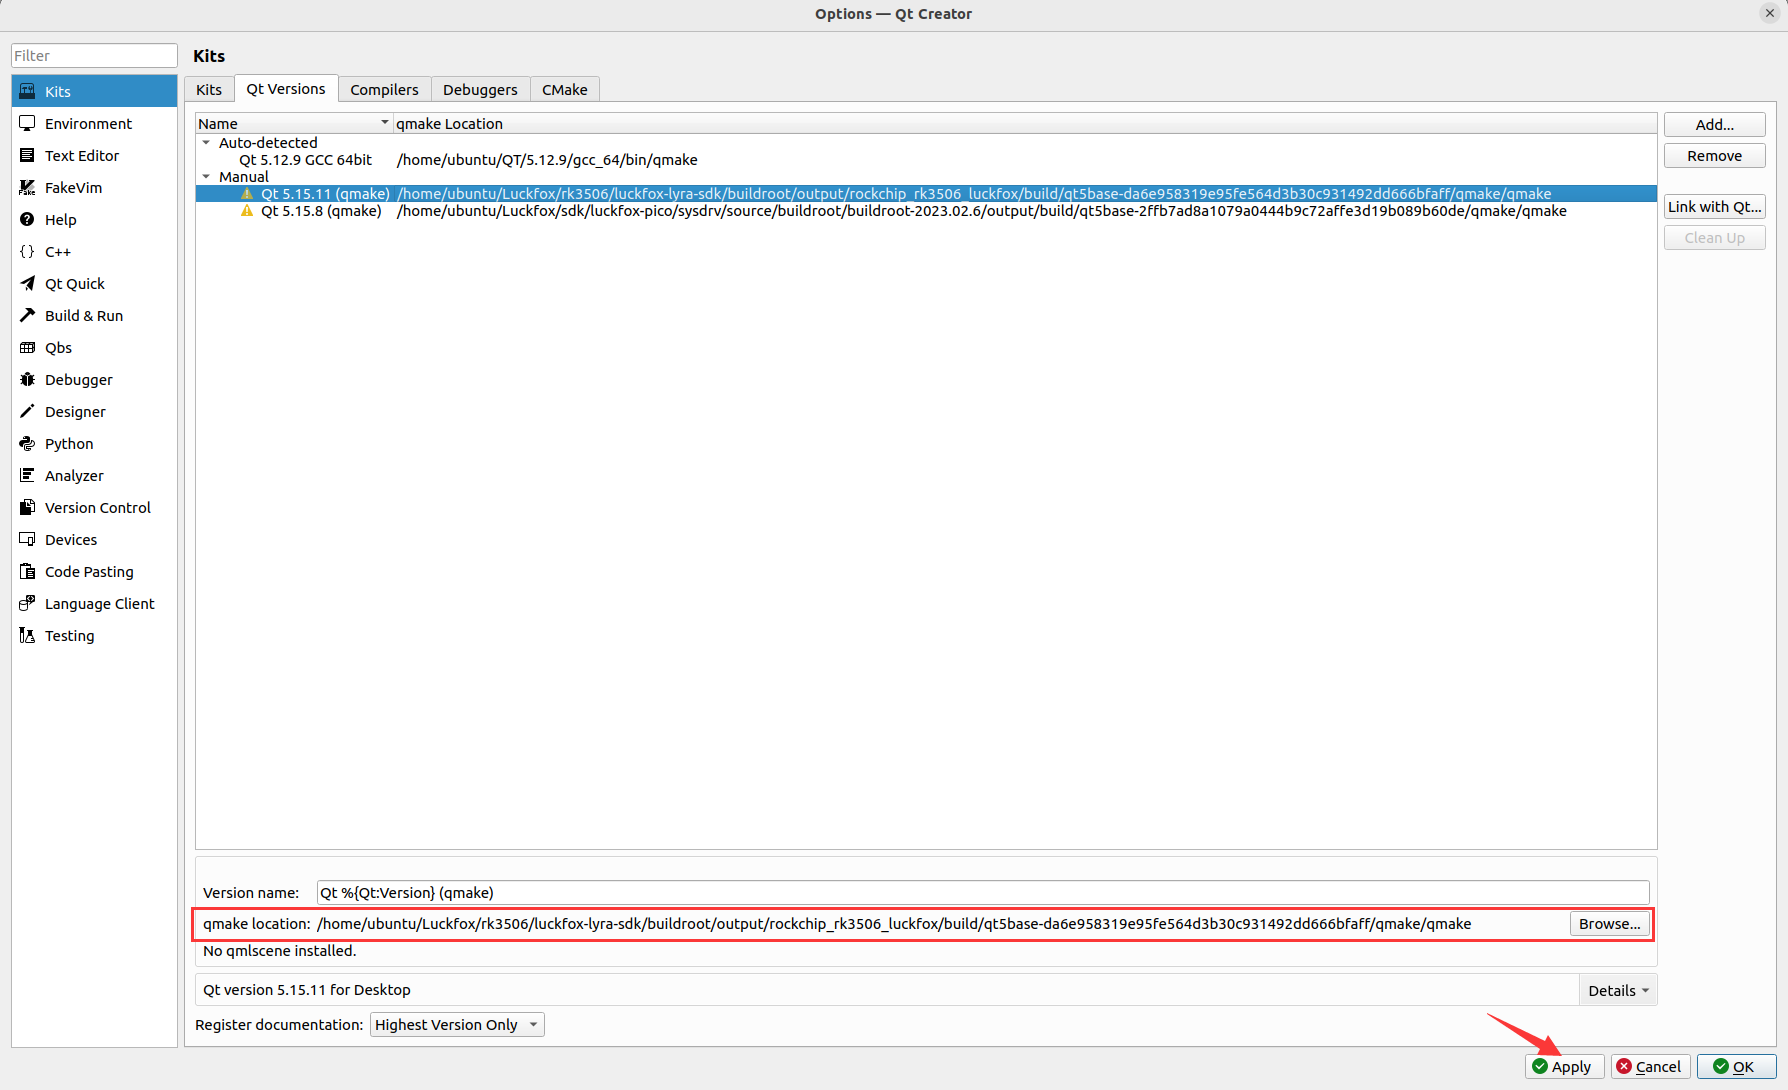
- Configure Qt Versions
- Configure Kits
8. Create Your First Project
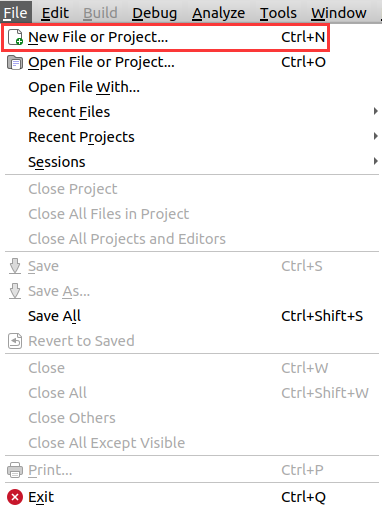
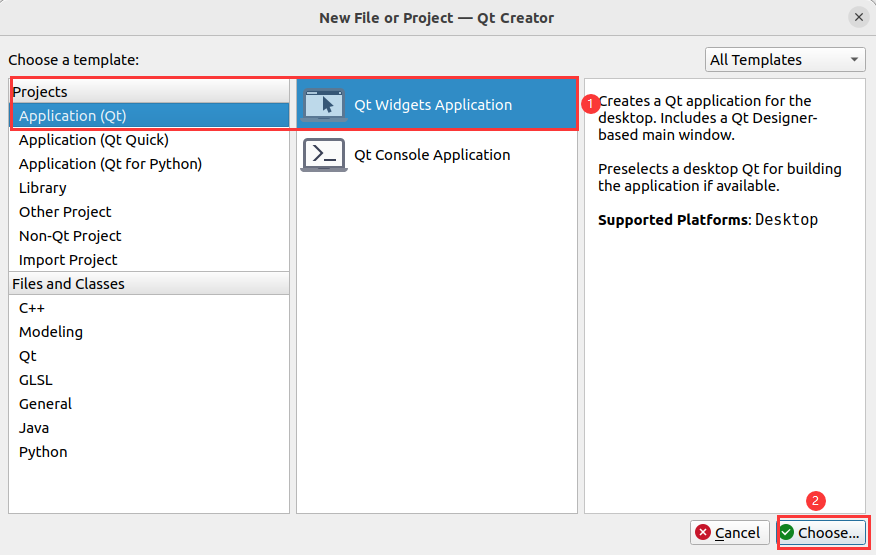
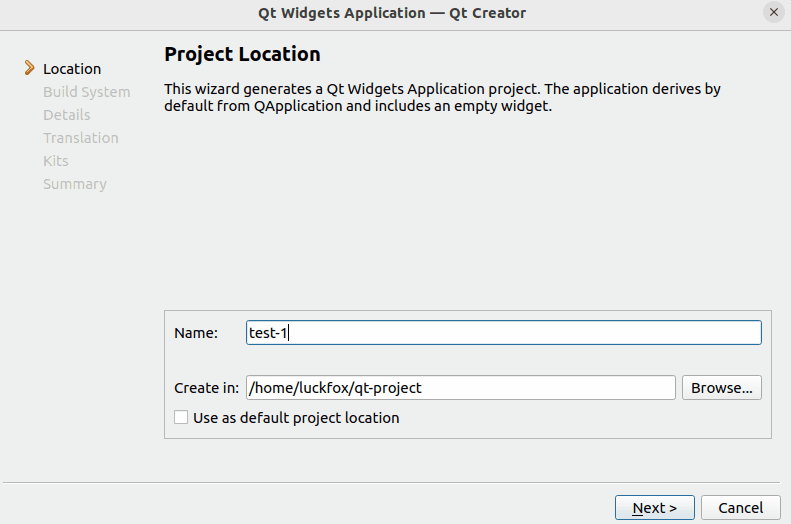
Create a new Qt project.
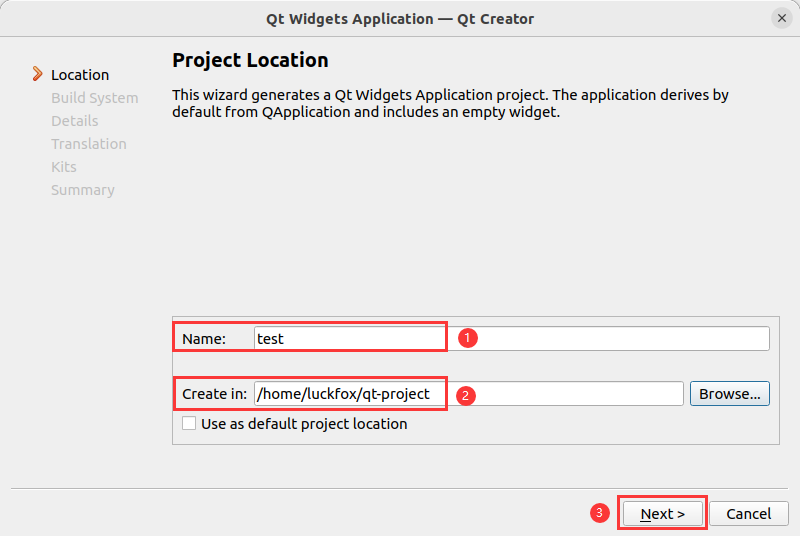
Name the project and select the storage path.
Choose qmake.
After completing your Qt project, navigate to the project directory for cross-compilation.
qmake && make- Upon successful compilation, an executable file will be generated:

- Upon successful compilation, an executable file will be generated:
Upload the executable file from the Ubuntu host (or virtual machine) to the development board:
scp test-1 root@192.168.10.138:/rootRun the program on the development board.
chmod +x test
./test -platform linuxfb